iPhones, Tools, Grids and Plein Air Painting
In my quest to learn everything about how we can use an iPhone effectively when setting up for a Plein Air Session, I learned a lot. I hope what I have learned can be as helpful to my readers as it has been for me.
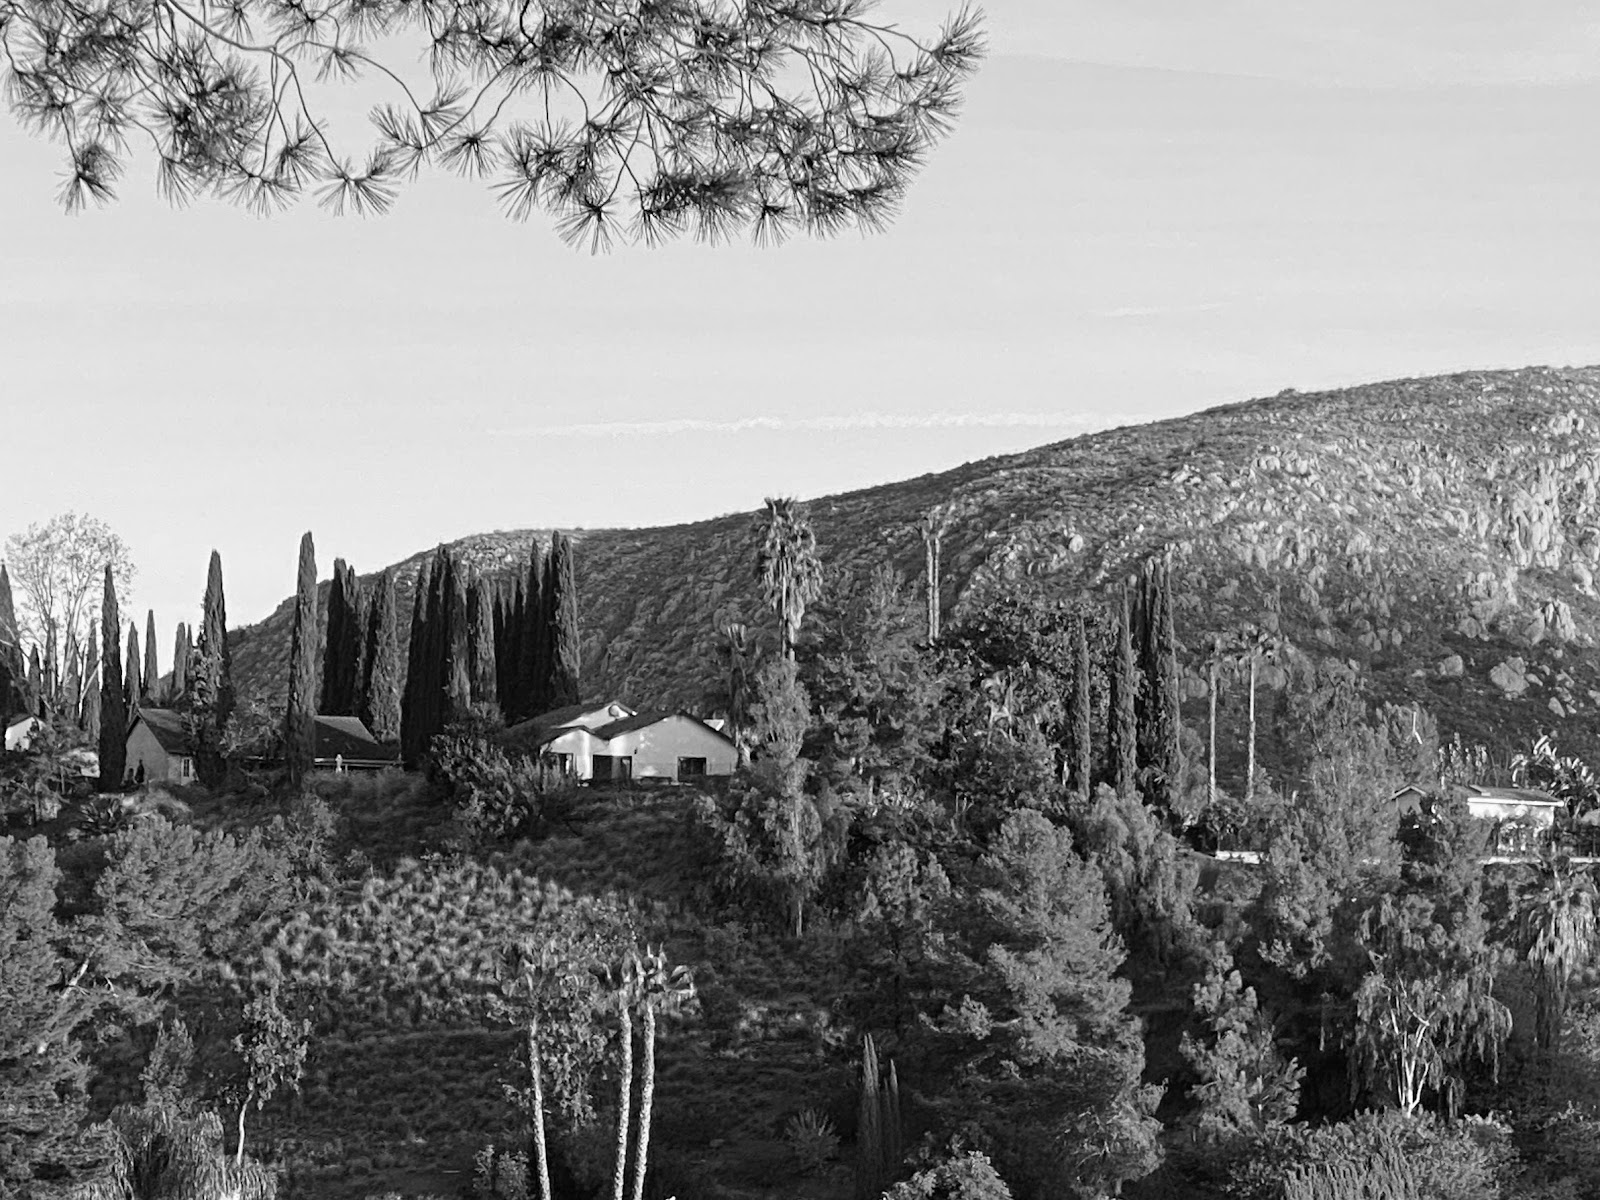
I wrote this post while staying in San Diego near my son's house in Jan 2023. I took the photo of the view from the back patio. I just read through the post (Jun 11) and rather then try to perfect it, I think it has enough useful information to publish the post.
June 11, 2023: originally published, republished Jan 31, 2026.
iPhone Editing/Cropping and Aspect Ratios
Tip #1. iPhones automatically take photos at a 9x12 (horizontal) or a 12x9 (vertical) ratio by default but it can be changed (see tip #2). For the WISE Apps' Dynamic Symmetry grids described below use the 3 to 4 OR the 2 to 3 ratio OR a Golden ratio. I have tried to edit a photo to my desired measurements incorrectly. This leads me to ..
Tip #2. The edit/crop tool provides a set of aspect ratios that you may use to adjust and crop your image (see arrow). You many watch a short uTube video illustrating this also: https://www.youtube.com/watch?v=1Q6euEpcqDc. The video shows how to expand or adjust the image around until it is cropped as you wish. I've learned to leave enough space around the original photo I wish to paint so that I can have enough sky, subject or ground above, below and to the left and right when I crop the image.
See example below.

Tip #2a. The possible aspect ratios available on my version 11 iPhone are Freeform, Square, 16:9, 5:4, 7:5, 4:3, 5:3, 3:2 with a vertical or horizontal option available.
Tip #3. If you select a specific aspect ratio such as the one for a 9x12 painting, 4:3 (the app shows the width: height, the reverse of how we display our painting size: height x width). then as you move the image around, pinching it to enlarge it, etc.., it will maintain the 4:3 aspect ratio. If you try to crop using free form or manual, it's difficult to get the ratio exact or to maintain it.
Tip #4. The aspect ratios to use for the standard size paintings are
- 4:3 for a 6x8, 9x12, 12x16 or 18x24 painting (4/3 = 1.3333...))
- 5:4 for a 10x8 or 20x16 painting (5/4 = 1.25) Could perhaps be used for an 11x14 panel since its aspect ratio is 1.272727... perhaps close enough to 1.25 in the field. (More on this panel proportion later; its aspect ratio is even closer to Root Phi). Perhaps the aspect ratio for a 14x18, another popular panel size, is close enough to use this option since 18x14 = 1.2857... In fact, note in passing that the aspect ratios for 11x14 and 14x18 are close to each other: 1.272727... and 1.2857...
- 7:5 for a 5x7 painting of course, or a 10x14 (not a popular size). (7/5 = 1.4)
- 5:3 for a 6x10, 9x15, 10x16.67. (5/3 = 1.666....) I use this aspect ratio to approximate a size I like to use: 10x16 close to the golden aspect ratio (PHI), 10x16.18. Note that 3, 5 are early terms in the Fibonacci sequence, 1,1,2,3,5,8,13,21,34,55,... I wish the phone provided a finer granularity for the golden ratio, say 8x13. 55:34 is ideal since it's the golden aspect ratio to within a thousandth (55 divided by 34 = 1.6176... or rounded: 1.618.
- One other popular size is worth considering: 14:11. Its aspect ratio is 1.272727...... Perhaps this is close enough to the aspect ratio of 5:4 (1.25) to be used in the field. .
- 3:2 for a 4x6, 8x12, 12x18 painting., not a standard aspect ratio for panels. (3/2 = 1.5)
- 16:9. I had hoped that the wide screen aspect ratio of 16:9 would be closer to the golden ratio of 1.618... (since it seems similar to 16:10), but 16 divided by 9 is 1.77777... quite a difference. It's actually closer to Root 3 approximately 1.732....
Plein Air Painting
I will use an example of a scene I am studying now. A house on the hill will be my focal point; in the morning, especially, the sun strikes its walls and they are a brilliant off-white.
Step #1. Look around and decide on the scene to be painted. Take a photograph for your reference. If I am using a 9x12 panel, using the phone to zero in on your image is easier since as noted above most camera images are already in a proportion of 9x12. I would try to have the perfect 9x12 image from my phone.Original photo:

This photo has too much in it. I did this on purpose since I wanted to use the iPhone to crop it appropriately with the upper-left house at a lower left focal point. I don't intend to keep any of the houses in the lower part. I do want to capture the light on the hill (secondary focal point).
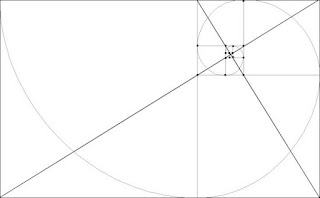
Step #2. Identify the focal point in the photo. We note that though the focal point is important, one could use the Dynamic Symmetry grid to get an overall feel for the composition, matching up diagonals with hill sides. If you are using a transparency with a dynamic symmetry grid then move it around over the scene to see if certain diagonals and intersections line up with important landscape feature. Pinch the camera if you are using it to enlarge the image and move it around again. This will be done partially in the image I am trying to capture. Then use the edit/cropping option with the 4:3 aspect ratio (horizontal) to try to align the house at this point. Read the tips above. I like to make sure the focal point will be close to the 'eyes' of the Dynamic Symmetry Grid rather than on the intersection of thirds. But there are other potential focal points or areas.

Step #3. Use an overlay app to superimpose your desired (transparent) grid over the photo. I have used Snapseed to overlay a Dynamic Symmetry++ Grid on the image (see additional post on using Snapseed):


Step 4. Monotone Version to check values. With this 9x12 image with the focal point at a desired position, create a b/w version or your cropped photo (Mono) from the phone directly. Use the iphone photos app to view the scene in different tones (including monotone gray scale): middle button in the image above. They range from normal to warm, to ..cool dramatic to monotone (useful for looking at values) or even the silvertone (more dramatic). Convert the photo to Mono to analyze the value pattern. There are several options here to consider. The guideline is that the image (and painting) should not be 50-50; it should have more light than dark or vice versa. Adjusting these options might take some practice. Or you can just select the b/w and go from there.


Step #5 Now produce a value study on an index card or sketch book (around 4x6 or better yet, 4.5x6. ) with a pencil, gray scale markers or pen and ink. I usually prepared a couple of index cards with a dynamic symmetry grid - or I might do a simplified grid with one diagonal and its reciprocal to identify one focal point. But if I am dong a more complex scene, in particular a city street scene I will take a transparency with a dynamic symmetry grid and superimpose it on the card for viewing.
In the landscape above I might consider a diagonal through the darker shadows in the lower left with a dominant horizontal and vertical through the house. I am looking up at the house so the horizon line is actually below the house The house is small enough that the perspective lines might not enter into consideration.
Image with added thrust lines: dominant diagonal (note:parallel with main diagonal), dominant vertical and dominant horizontal:


This might be a lot of work and very time-consuming. I intend to practice until these steps take only a few minutes. Then I can determine if it's worthwhile. I have been using my phone for years to take photos on site. I've even cropped as needed. I think I can be more efficient with practice and with these tools.