How To: Grid Overlay on an Existing Painting using Photoshop

Introduction

Dynamic Symmetry grids are available from the website, Canon of Design: https://www.ipoxstudios.com/canon-of-design-essentials/. I recently purchased an $11.99 package with literally hundreds of grids for PHI and many ROOT rectangles and popular camera or film sizes. Some of the grids have black lines as in these examples and some white lines. Our most popular painting canvases don't necessarily have grids that fit with the same proportion, but some are quite close.  
Some examples (you may select any of these for download to your computer. These inserted images are smaller than the original but useful I think; they don't need much resolution).  Note that the package I downloaded also has some very useful camera-sized grids.  The website owner has many free posts on using these grids and has some free downloads also.


eg: 6x8, 9x12, 12x16, 18x24

Golden Rectangle

Golden Rectangle


Close to 5x7 since 7/5 = 1.4 and Root 2 = 1.414..


eg: close to 11x14 since 14/11 = 1.272727....

Let's see if I can find one more: 8x10. or 4x5. It was in an older packet.
4x5 or 8x10, 16x20

The older package also had 14-line grids; eg, the Harmonic Armature.  It's relatively easy to create one of these armatures though, using an iMac's Preview for example. Then since the armature doesn't rely upon perpendiculars or rebated squares, we can stretch it to any proportion:
8x10 but can be stretched to any proportion

Tip: I created some examples combining the grids. 1. Open one grid with Photoshop. 2. Drag second grid over the first (same proportions). 2. Then select the "Multiply" (black on white) or "Screen" (white on black) option. 3. Screen capture the combination for a new combined grid. 4. Use the process below to apply this new grid to your desired painting image.


Construction

1.Select an existing painting to be overlaid with a grid and drag it to Photoshop (or open it with Photoshop).


2. Find the desired "PNG" grid for the overlay on your painting. (See other posts for instructions on the creation of this particular hand-made grid),

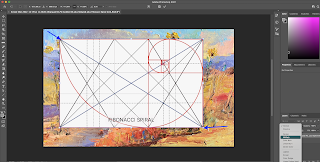
3. Drag it over your painting image in Photoshop. 


Sometimes the painting image itself has a color profile that doesn't allow an overlay. In this case do a Screen shot of the painting jpeg image (see below for instructions) to covert it to a png without the color profile and start over.

4. Stretch the overlay to fit the painting by grabbing the corners and dragging to the image corners.


5. Convert it to transparent by changing the setting in the layer from "normal" to 'multiply'.  If the overlay is black with white or light lines, use the setting "screen".  


6. Save the resulting image to a psd file. Give it an appropriate revised title to include the grid style. I skip this save step and instead do a screen capture of the image with the overlay to be used for analysis or for insertion into a blog or website post.


Sunflowers Everywhere 10x16.18 with DS Grid Plus and Spiral

(The 'Plus' in this case refers to the rebated squares added to the Dynamic Symmetry -DS- grid.)

Conversion to a 'png'

A photo may need to be converted to a 'png' for photoshop, taking a screen shot of the image:

  1. CMD/Shift/4 and 
  2. use your mouse to drag a rectangle around the image
  3. then click with your mouse
  4. a 'png' screen shot will appear on your desktop. 
There are other ways to do a screenshot; this is the way I do it.


Popular posts from this blog

Color Wheel Revisited

(extra) Color Palette Examples

(extra) Color Mixing on the web with online Apps with RGB and CMYK